How to schedule an outbound call campaign?
This guide explains how to schedule a manual outbound call campaign. Learn to create campaigns, select contacts, set follow-up actions, and schedule calls for efficient engagement.
Step 1: Create a New Campaign
- Click the New Campaign button and provide a name for your campaign.

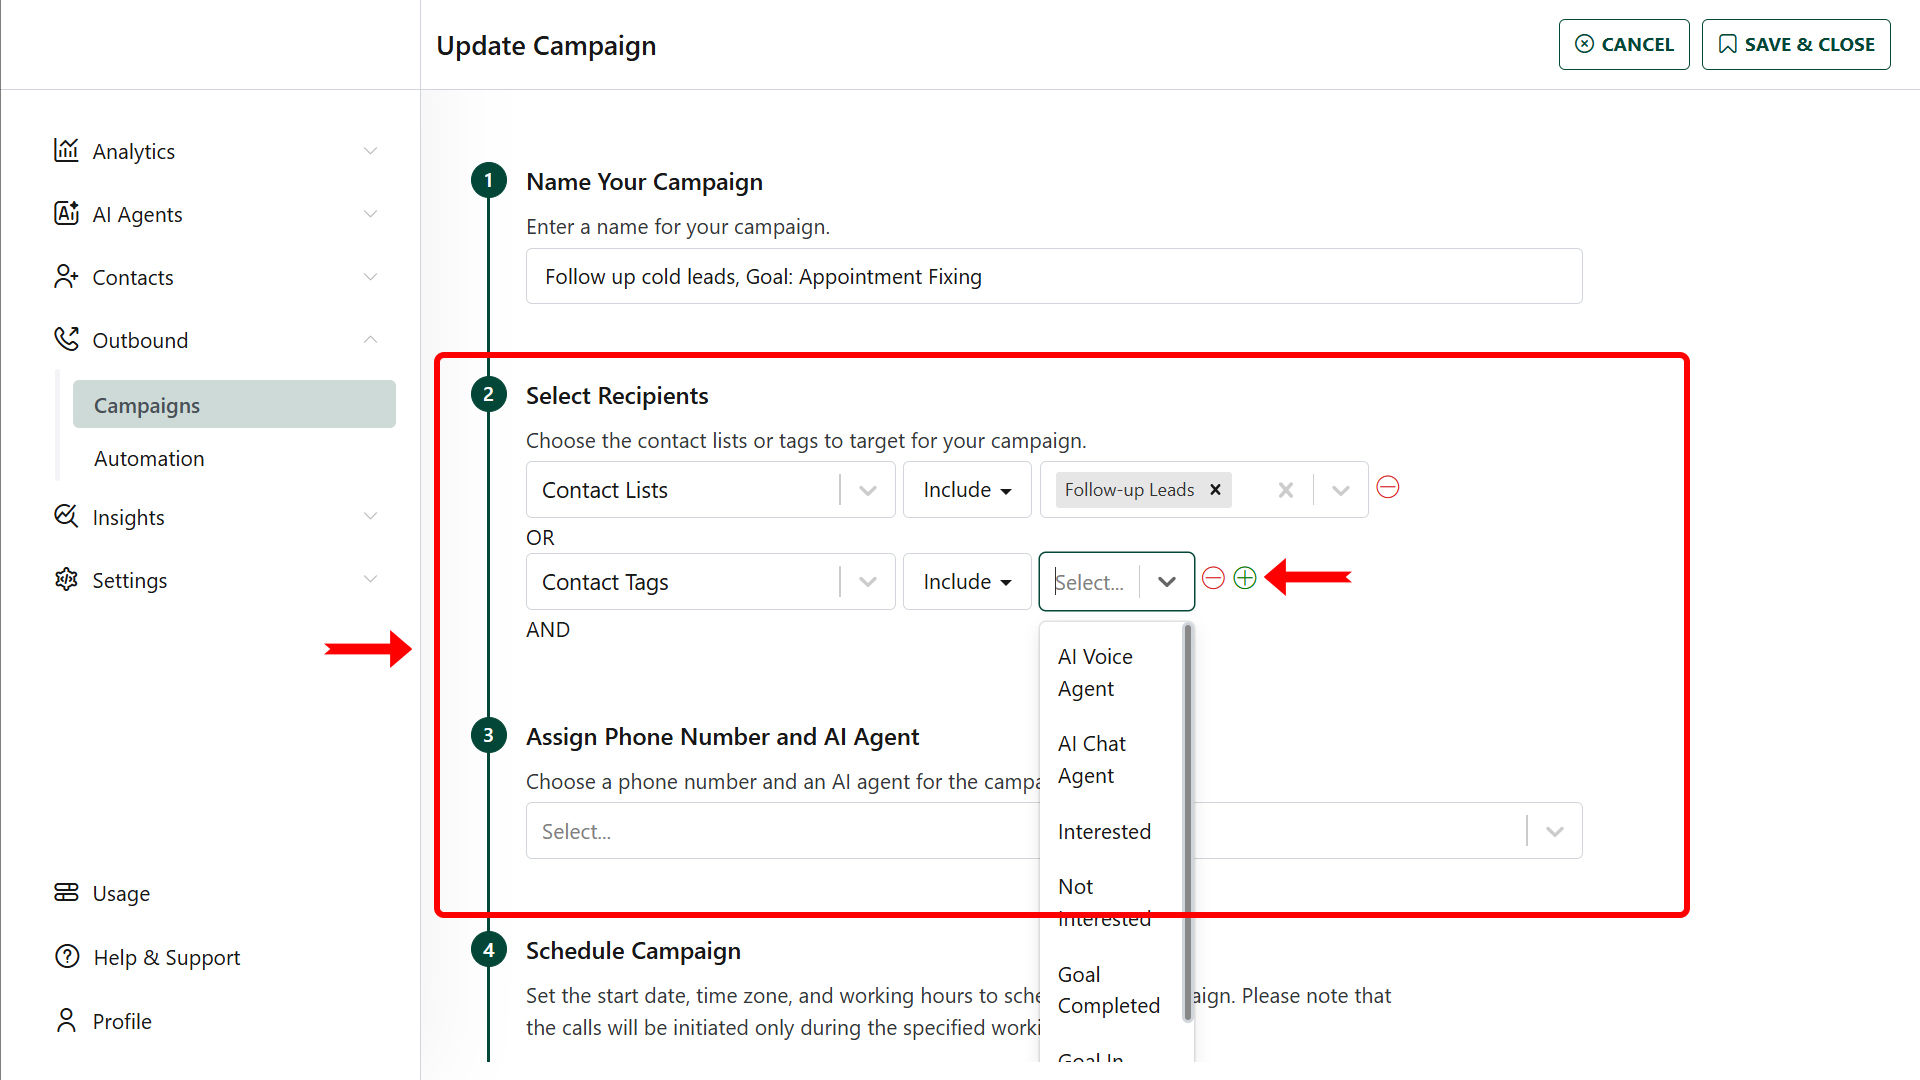
Step 2: Select Recipients
- Choose a contact list or tags for your campaign.
- Add conditions to filter your audience by clicking the “+” button to include multiple criteria.
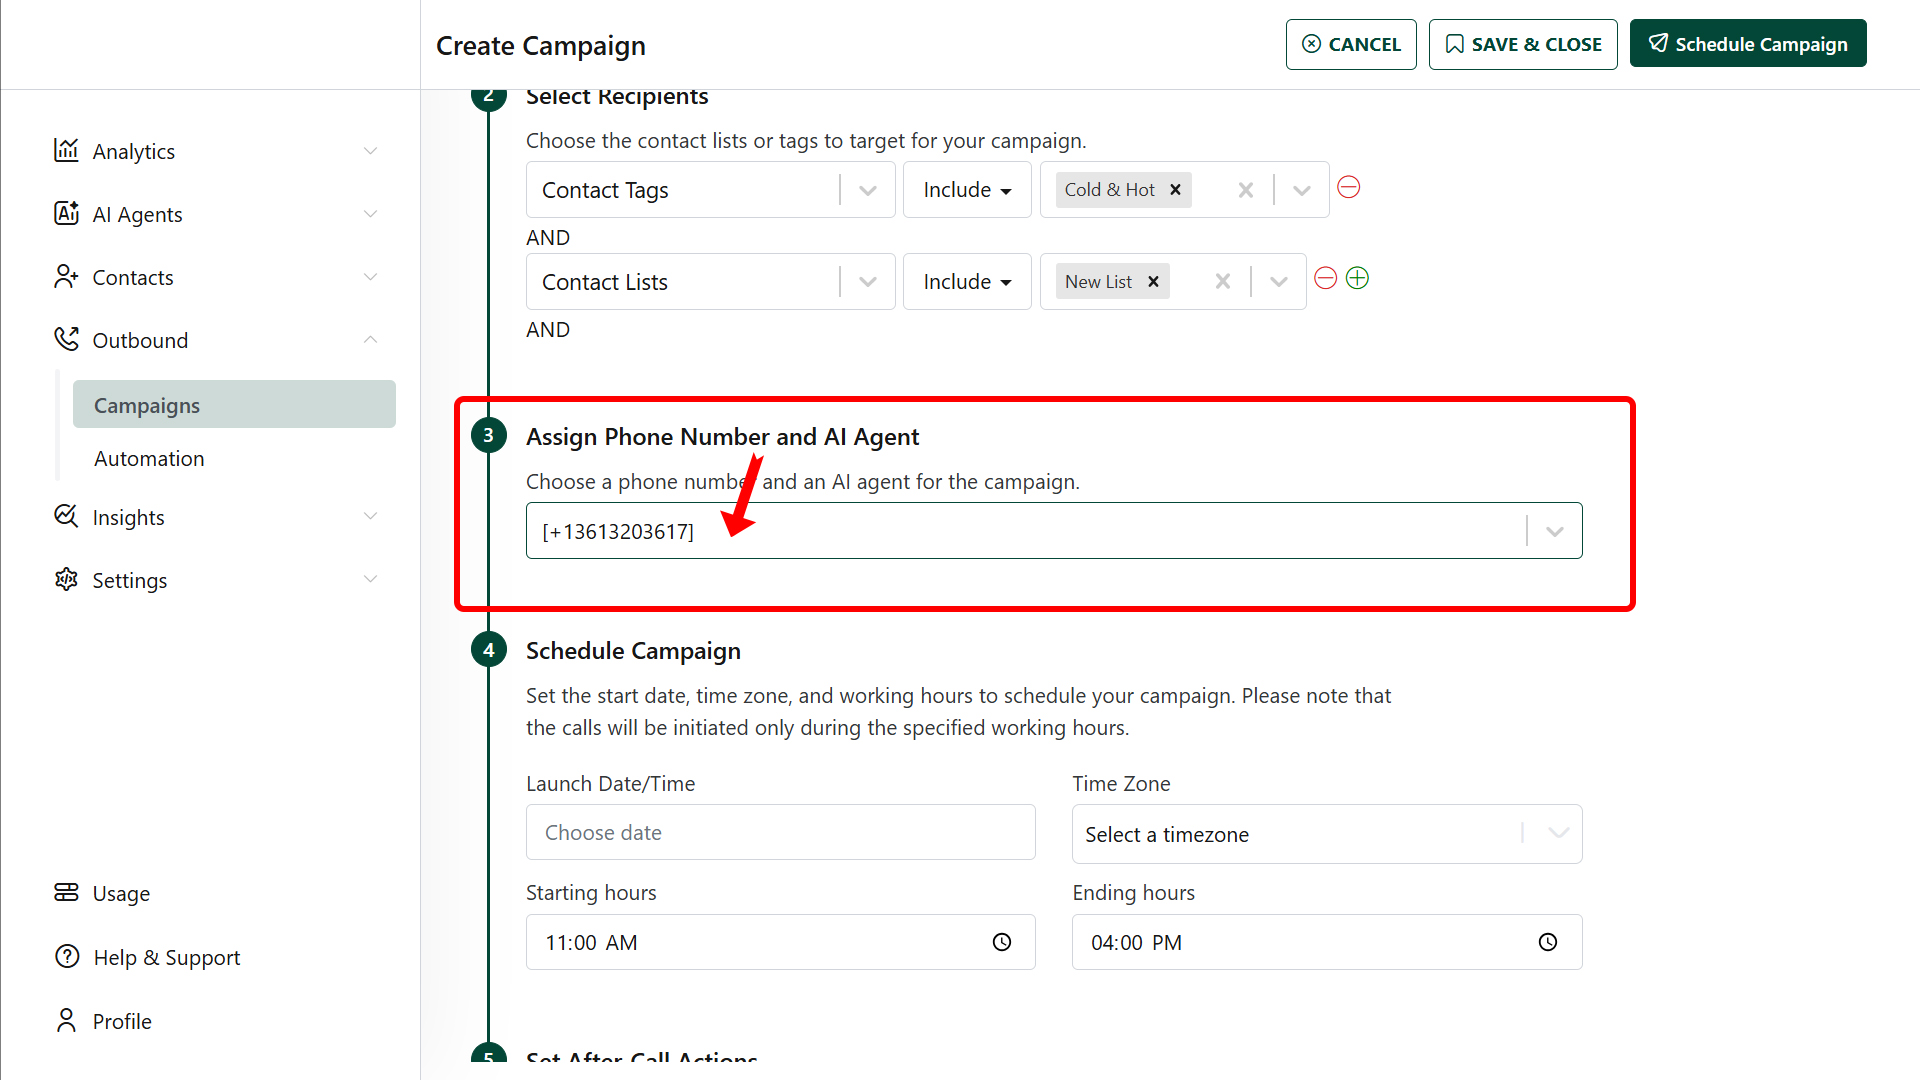
Step 3: Assign Phone Number and AI Agent
- Select the phone number and AI Agent that will handle the calls.
Step 4: Schedule Campaign
- Define the launch date, select the time zone, and specify working hours.
- Ensure the campaign aligns with your audience’s availability for optimal results.

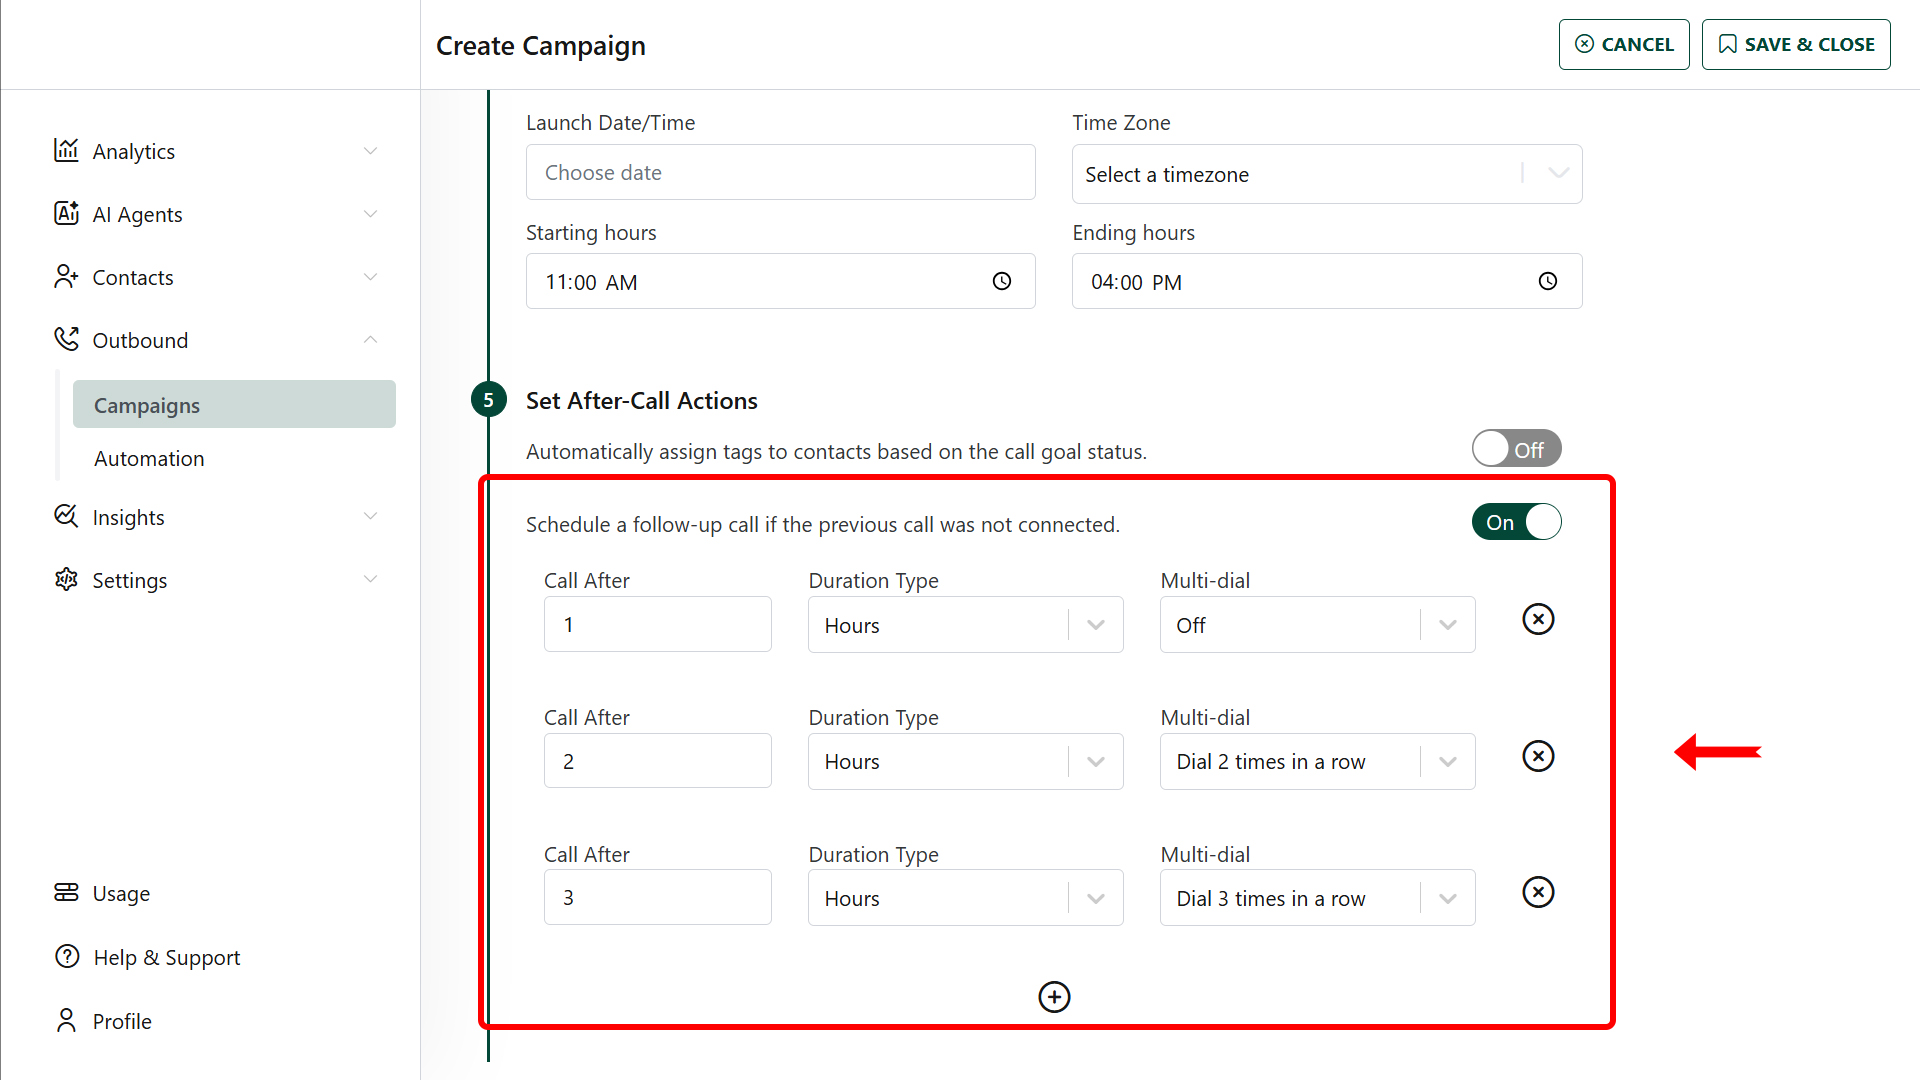
Step 5: Set After-Call Actions
5.1. Assign Tags Based on Call Goal Status
- Dynamically update tags (e.g., "Interested," "Follow-Up Needed") based on call outcomes.
- Define goals as "Complete" or "Incomplete" using tags for better contact segmentation.
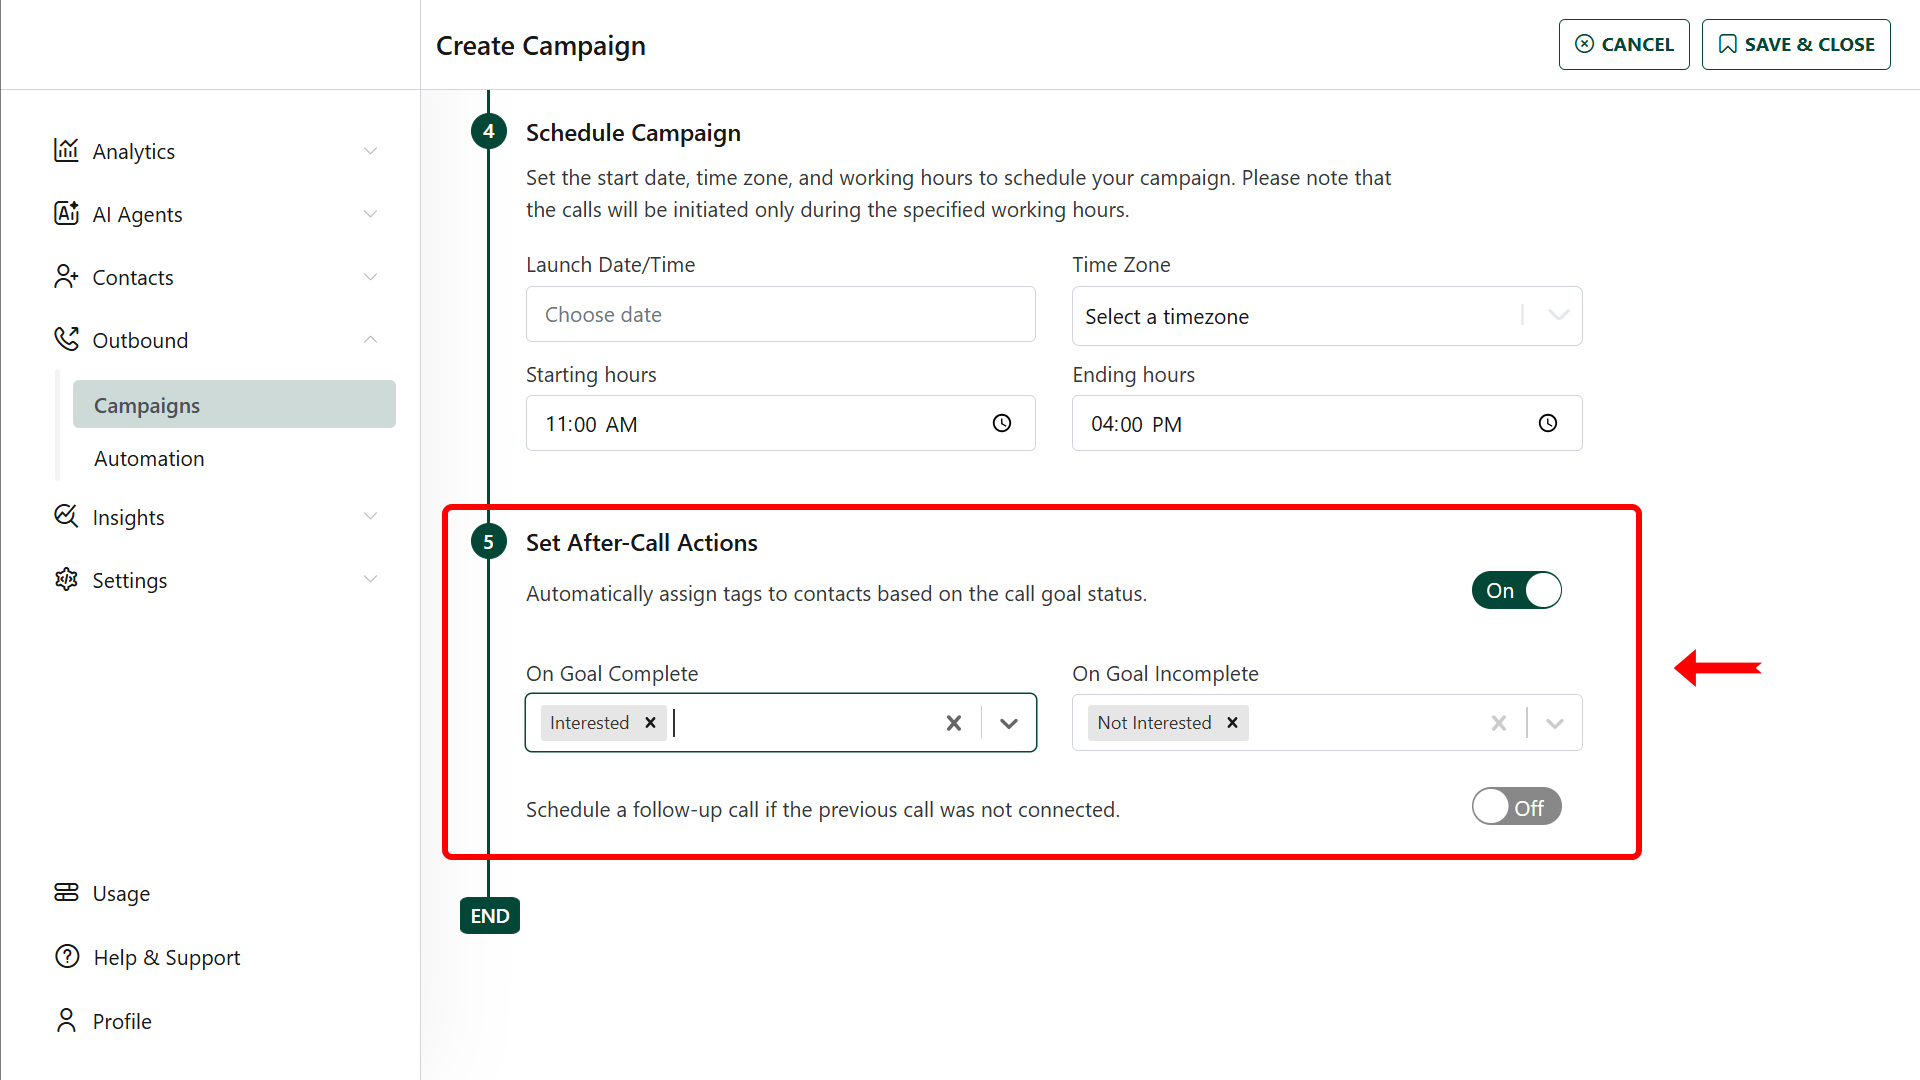
5.2. Schedule a followup call:
- Toggle the On button.
- Set the duration type (Minutes, Hours, Days) and input the desired interval.
- Use the Multi-dial option to automate retries.
- Click the “+” button to add more follow-up actions.
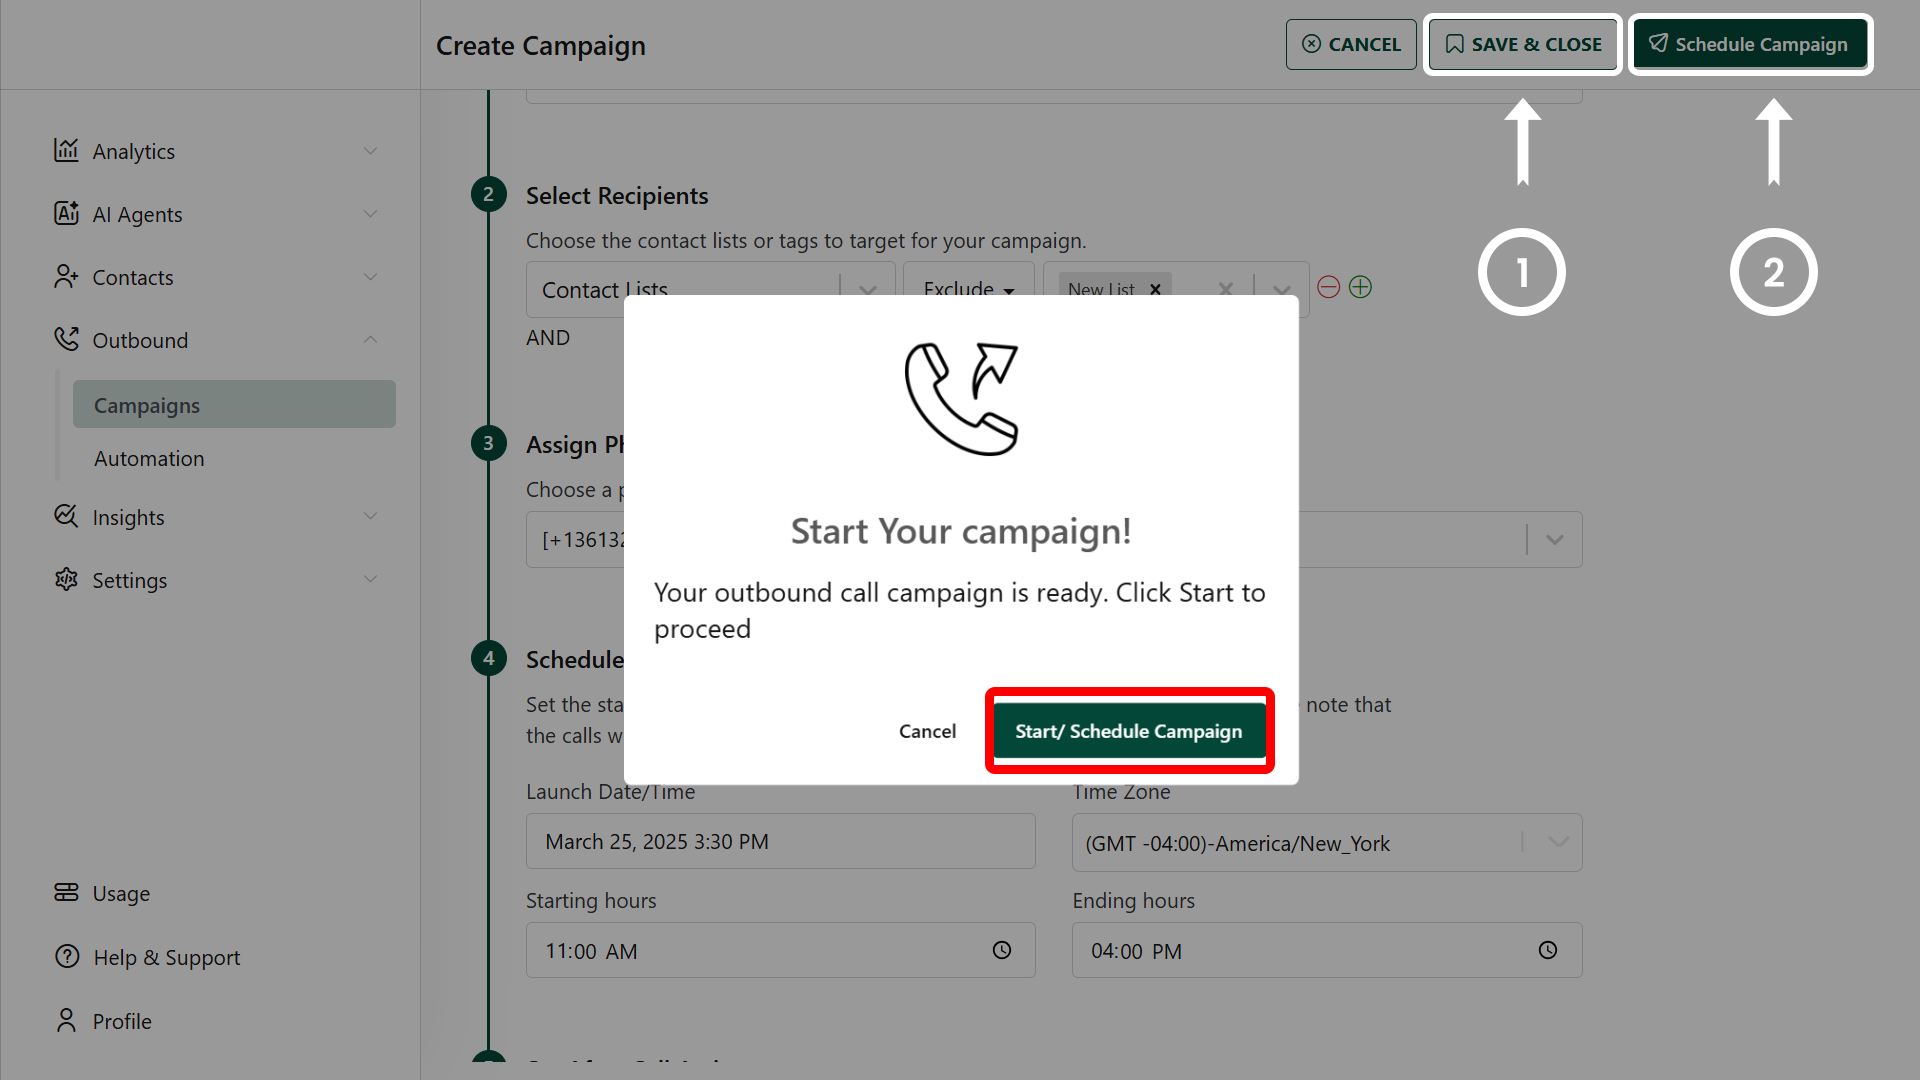
Step 6: Save & Start Campaign
- Click Save and Close to draft your campaign.
- Select Start/Schedule Campaign to execute it.
This structured approach ensures efficient and targeted outbound campaigns!