Setting Up a Sub-Account
This guide provides step-by-step instructions to create and configure a sub-account, including setting roles, permissions, and access controls tailored to your requirements.
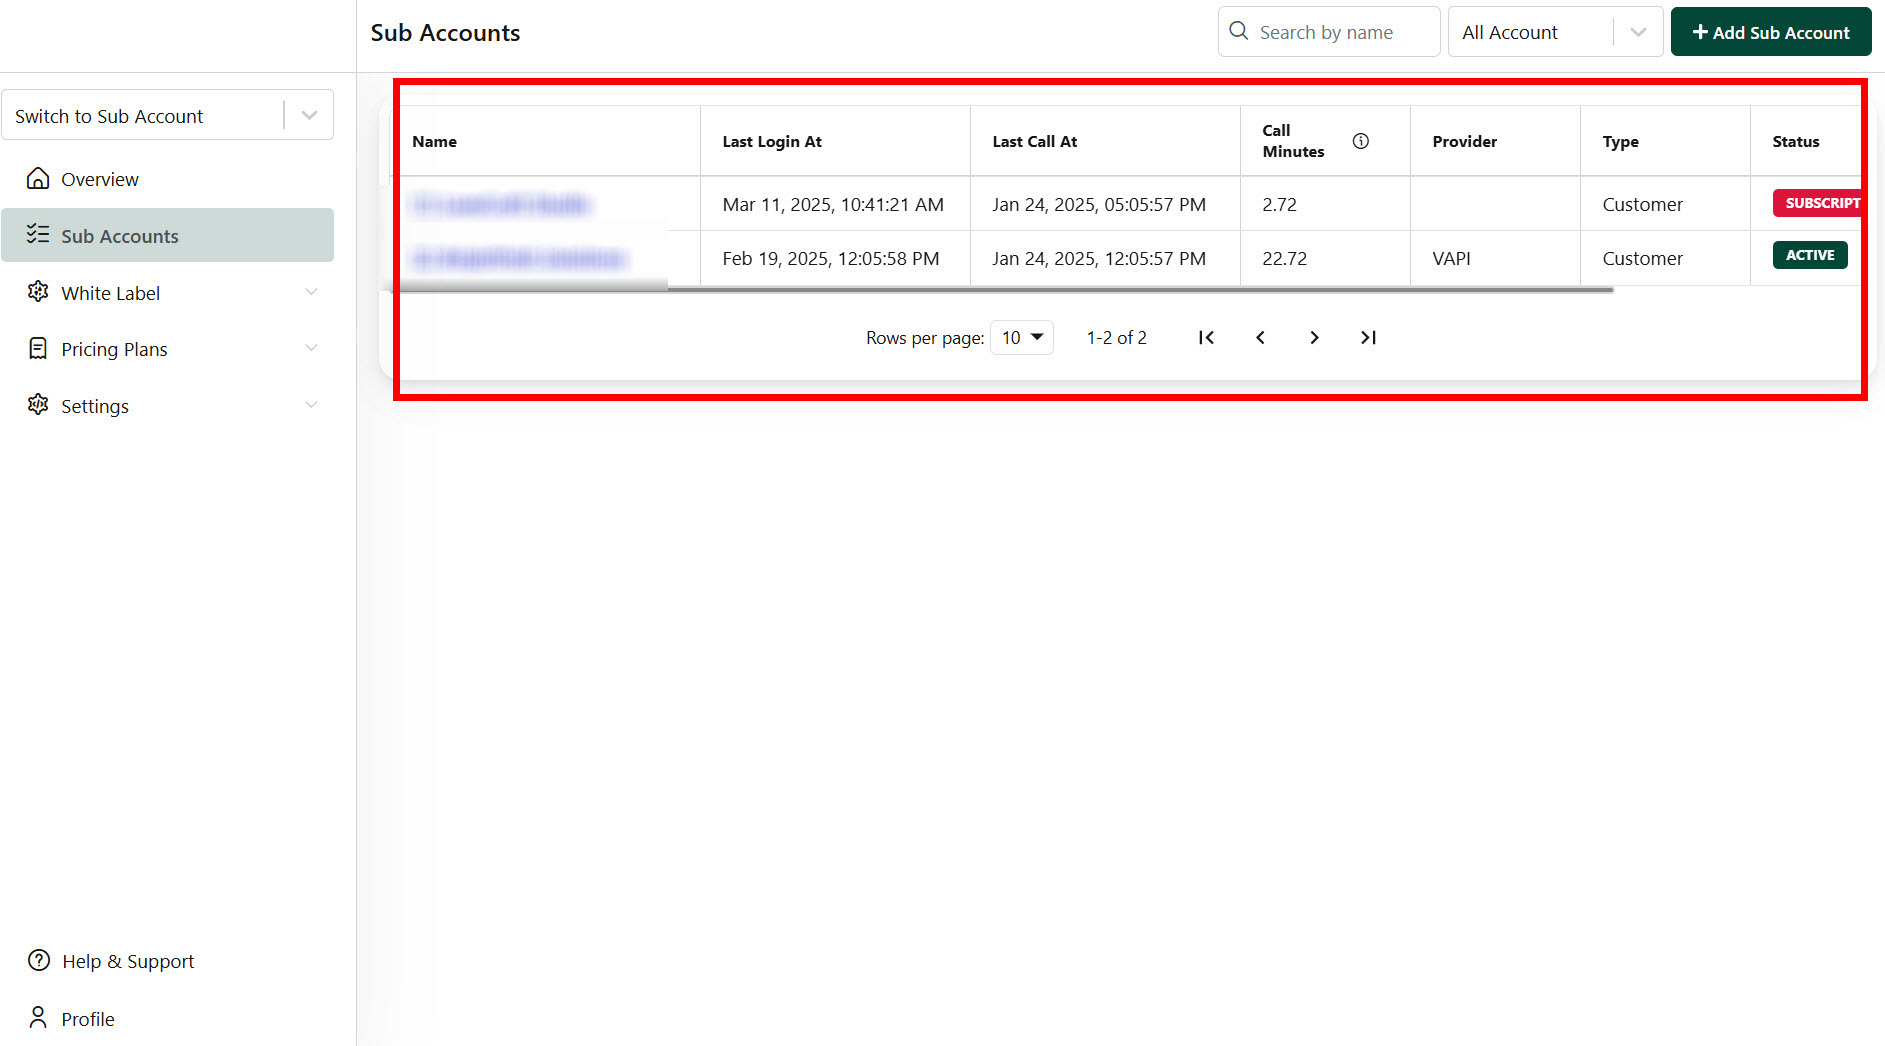
1. List View of Sub-Accounts
- Customer Activity: View the customer's last activity, such as last login and last call.
- Voice Provider Details: Identify the voice provider in use.
- Customer Status: Check if the customer is Active or Inactive.
- Access Account: Use the "Access Account" button to log in as the customer.
2. General Settings
- Enable/Disable Sub-Account: Toggle the sub-account status.
- Delete Sub-Account: Remove a sub-account if needed.
- Editing Restrictions: Sub-account names cannot be edited.

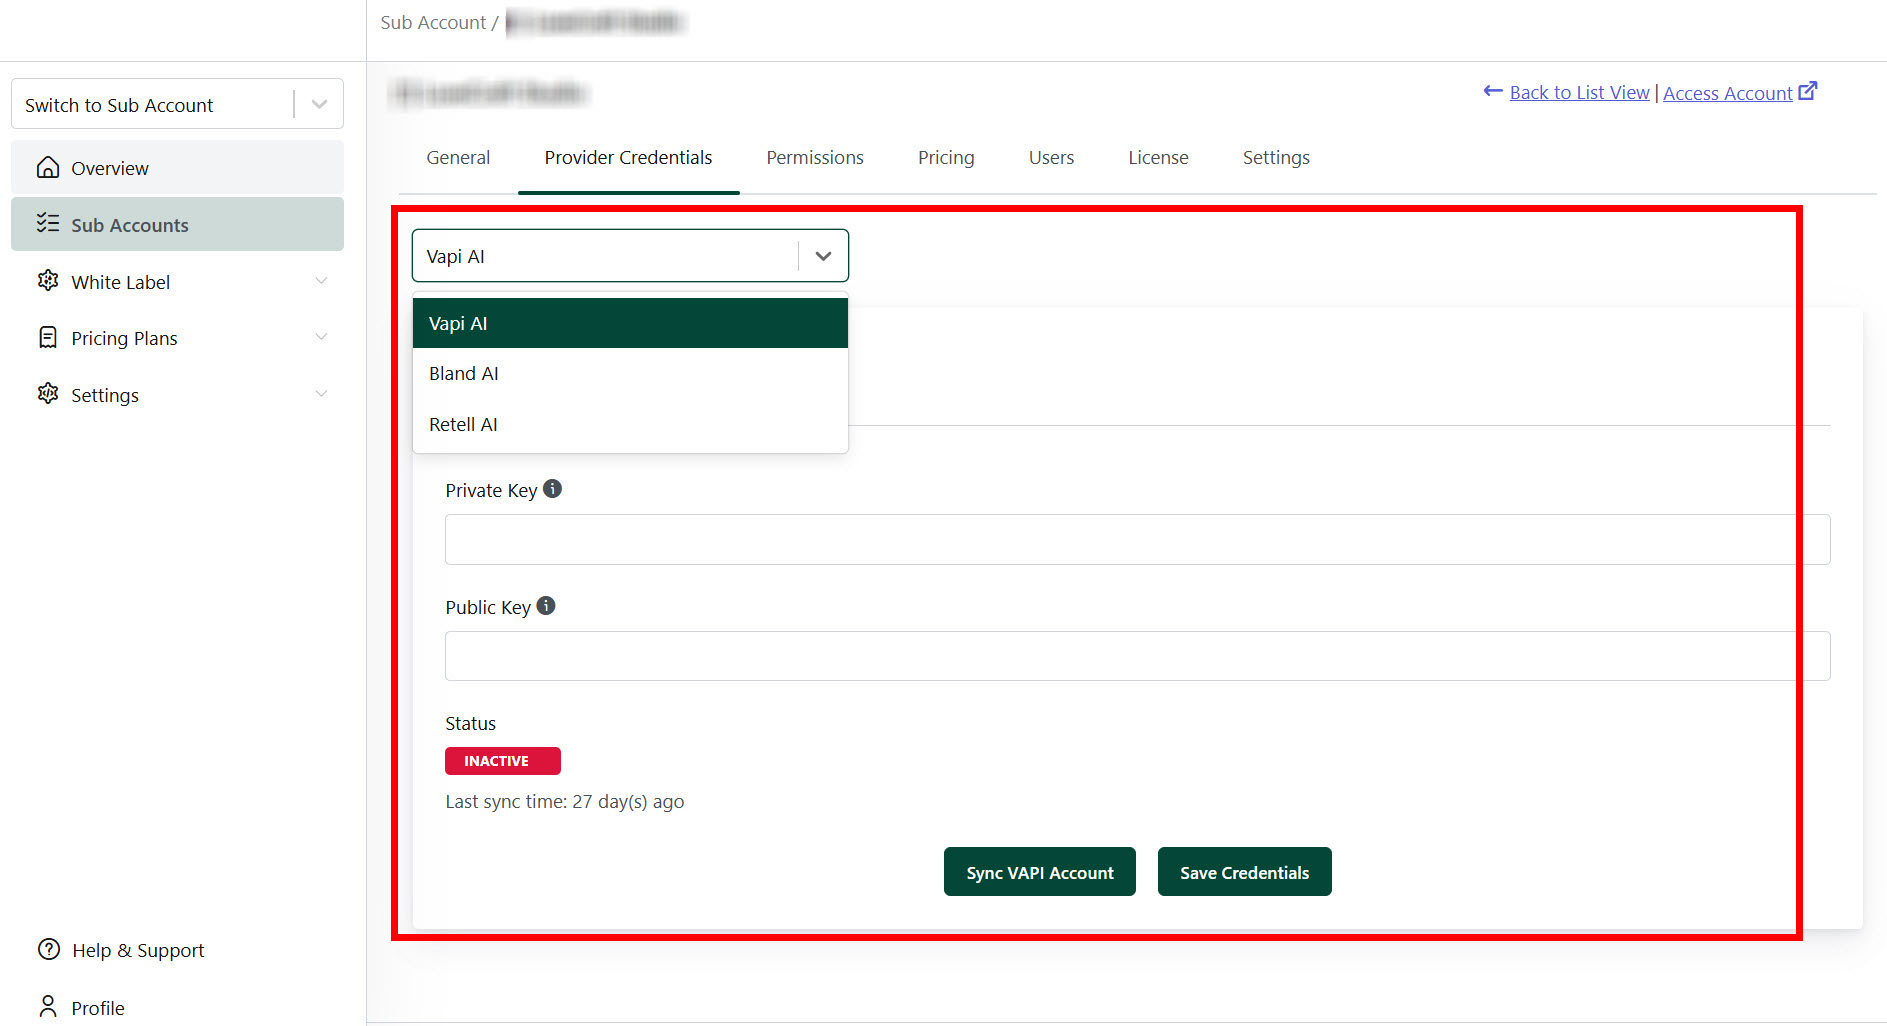
3. Provider Credentials
- Login Button: Use the hyperlink button next to the voice provider name to log in.
- Provider Change: Be aware that changing the connected voice provider will delete the existing configuration. A new provider must be set up from scratch.
- Last Sync Time: Check the last sync time displayed under the status section.
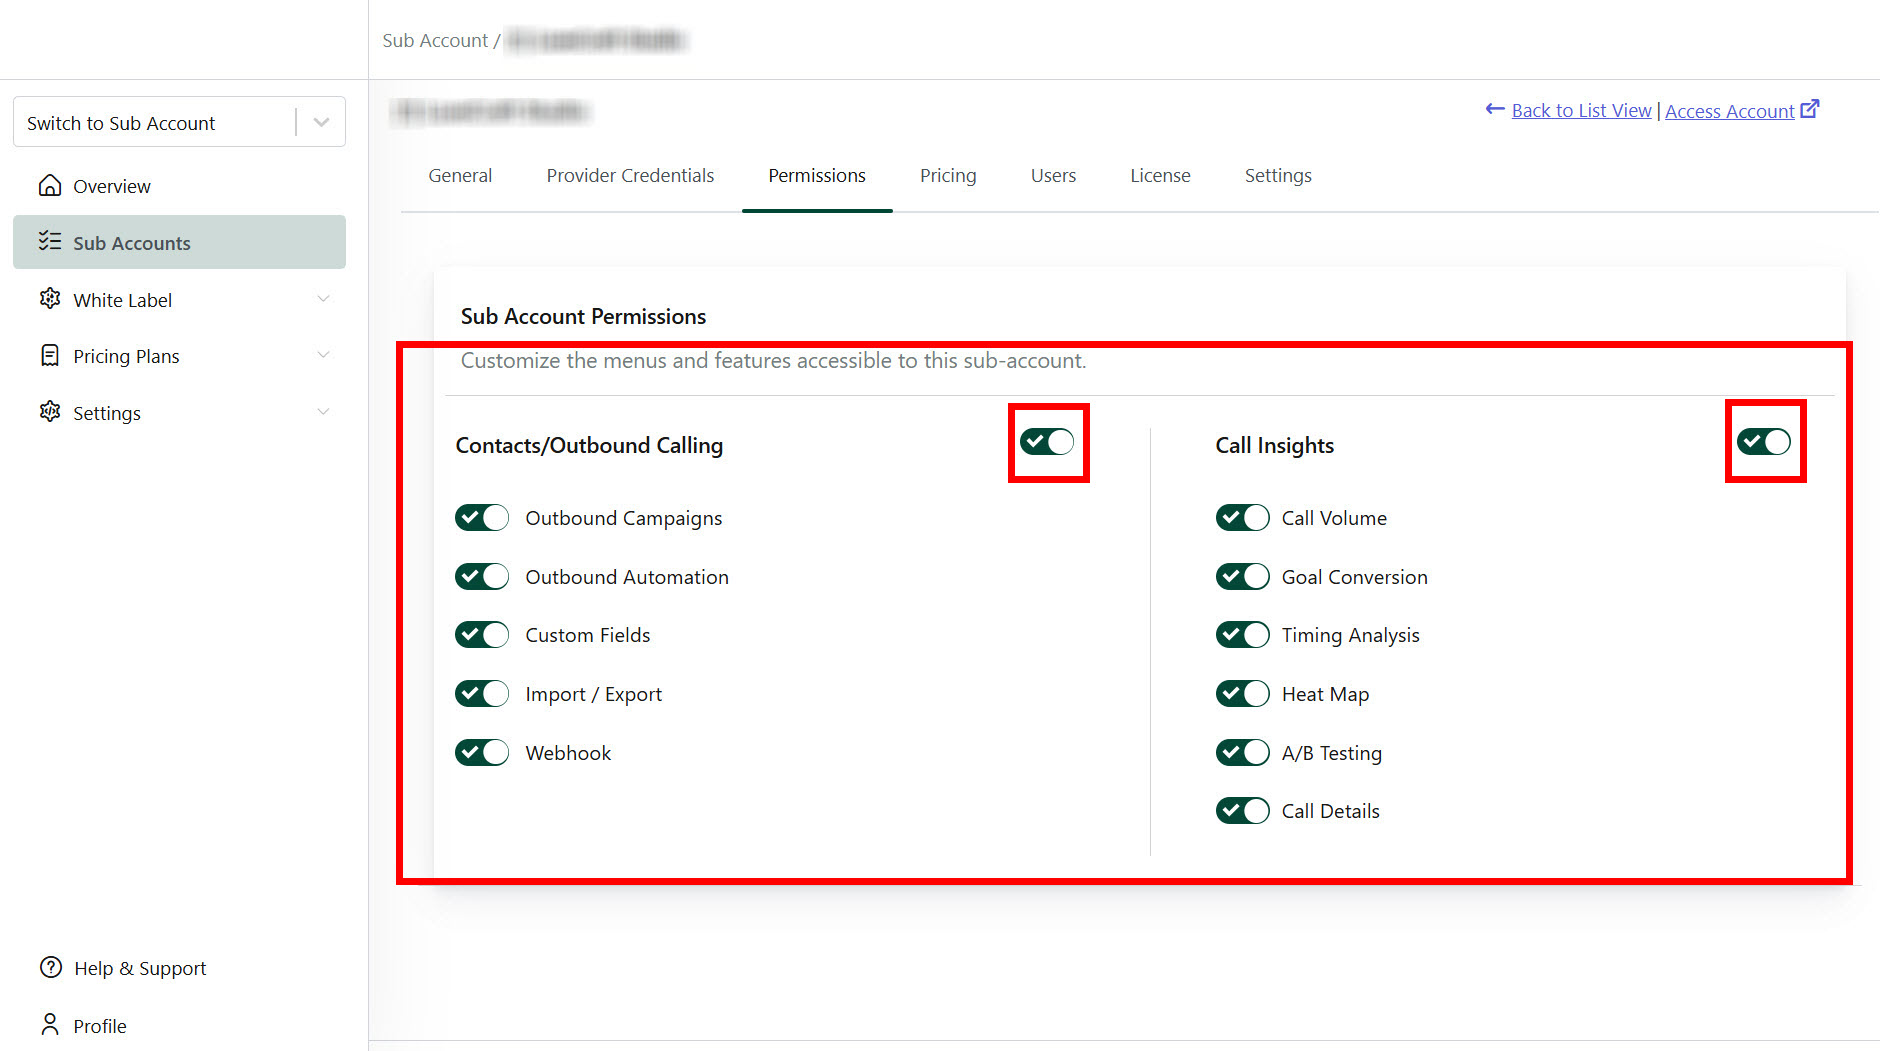
4. Permissions
- Menu and Feature Access: Customize menus and features for the sub-account.
- Contacts/Outbound Calling: Show or hide these features either partially or completely.
- Reports: Remove this menu if the customer does not require reports.
- Save Changes: Click "Save & Publish" after making updates.
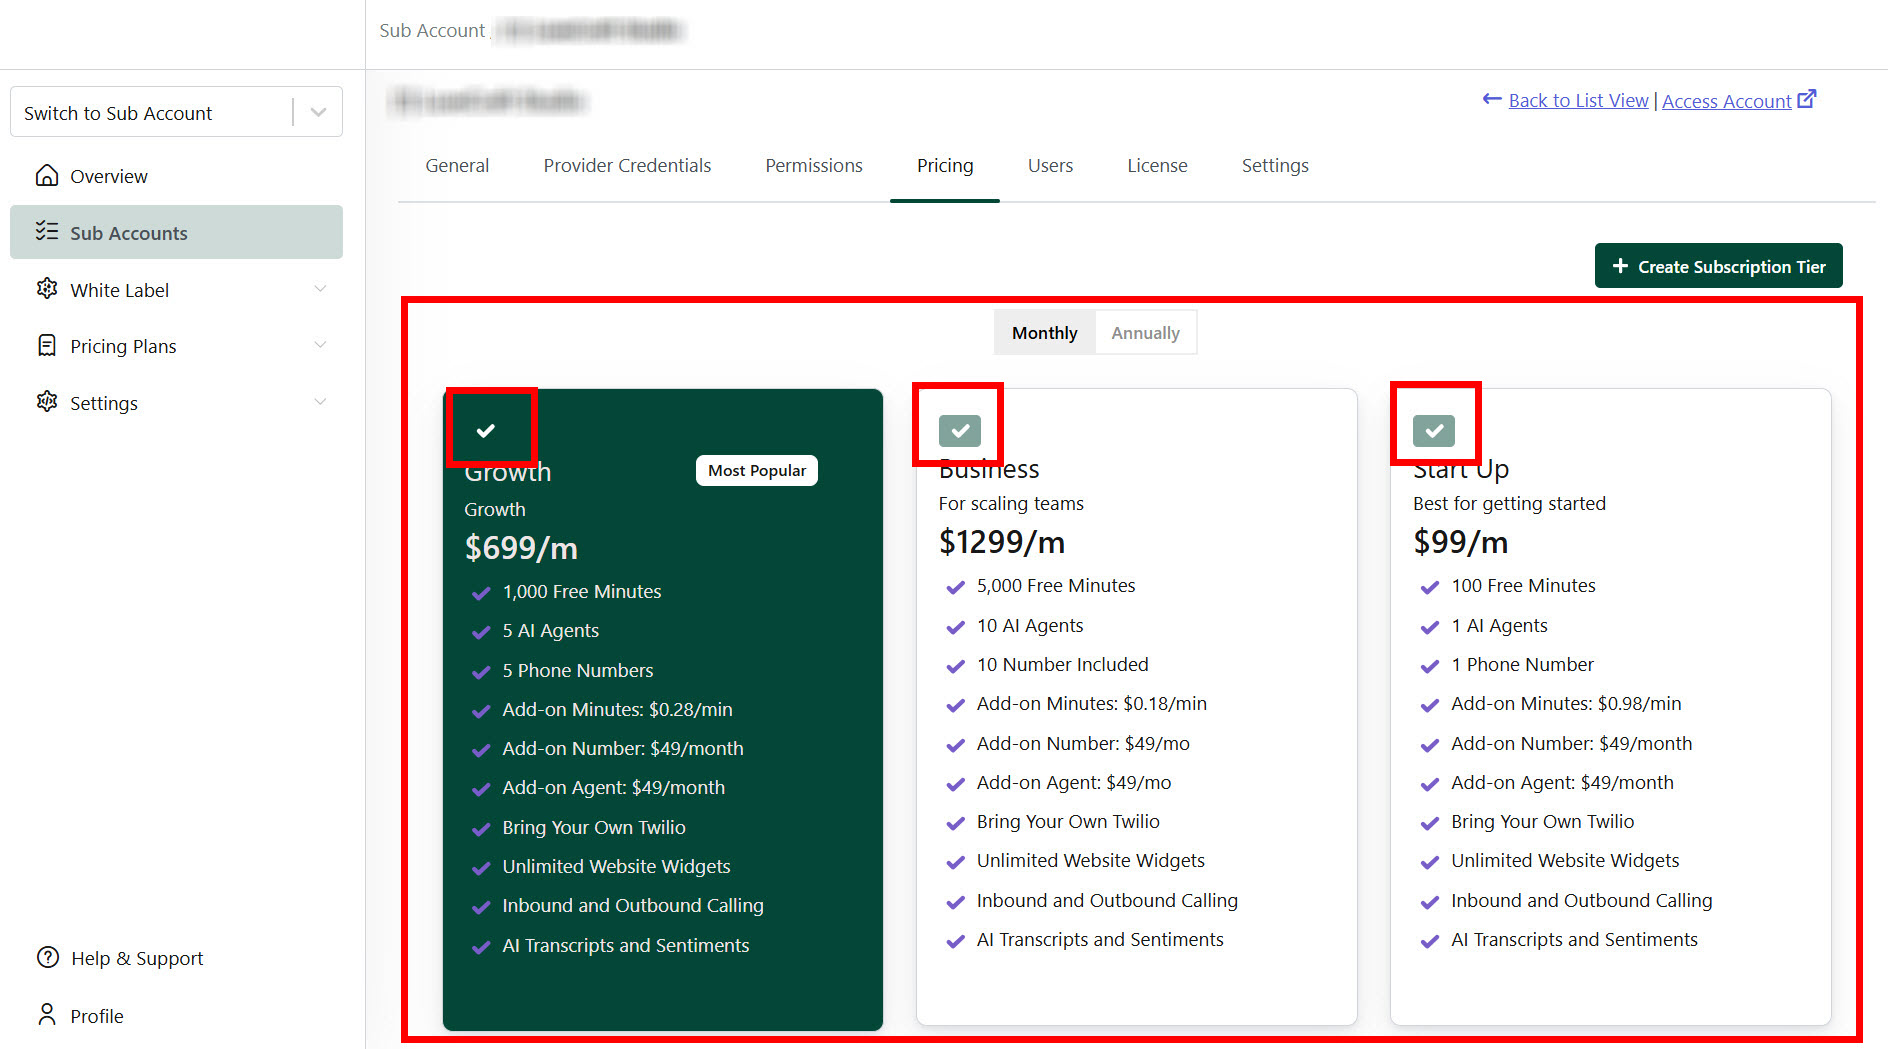
5. Pricing
- Enable Pricing Display: Select the checkbox above all subscription pricing tiers to make them visible in the customer's application.
- Reorder Pricing Plans: The last selected pricing will appear as the first pricing plan.
- Unlimited Options: Create unlimited plans and mark options as popular.
6. Users
- Add Users and Roles: Assign roles as "Admin" or "User."
- Set Time zone: Input the time zone (e.g., America) and select the relevant option.
- Email Editing Restriction: Once created, emails cannot be edited.
- Update User: Save changes by clicking "Update User."

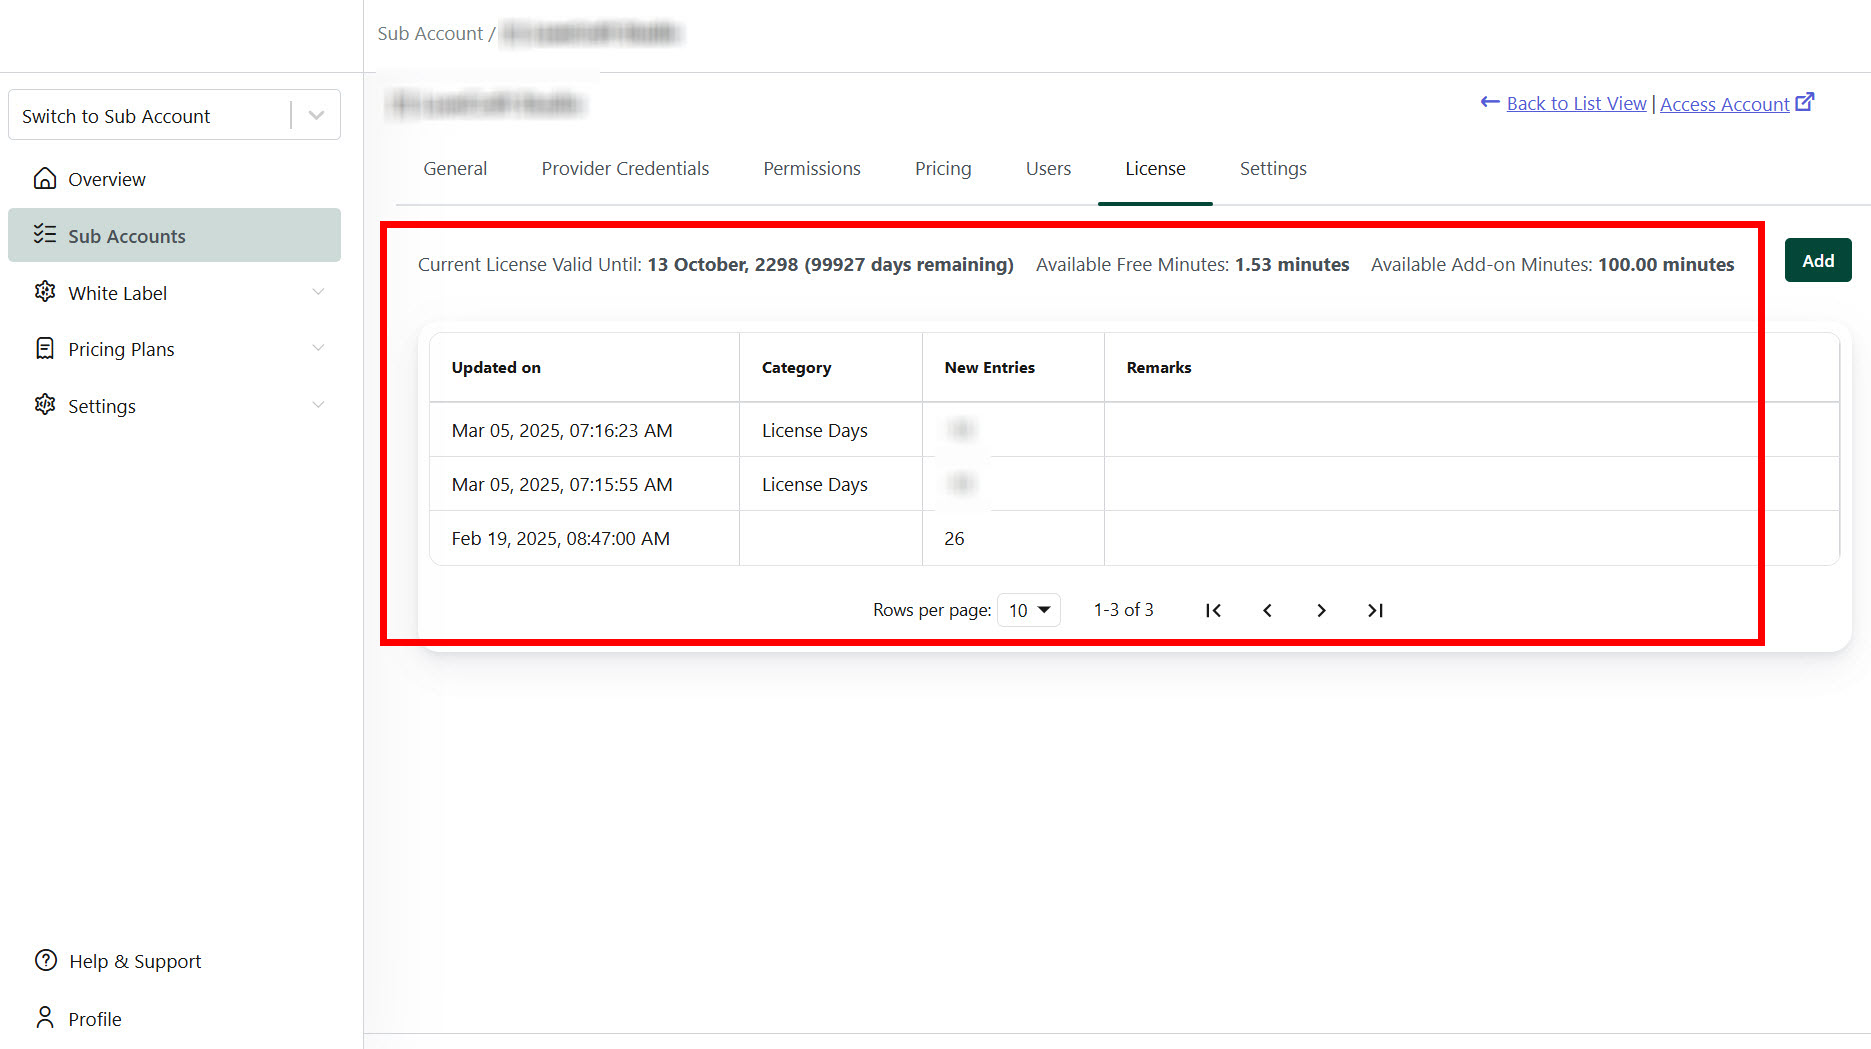
7. License
- View License Information: Access current license validity, available free minutes, and add-on minutes.
- License History: View past license details and sort them in ascending or descending order by clicking the column name. You cannot reduce the license.
- Internal Remarks: Enter remarks for each license addition for internal reference.
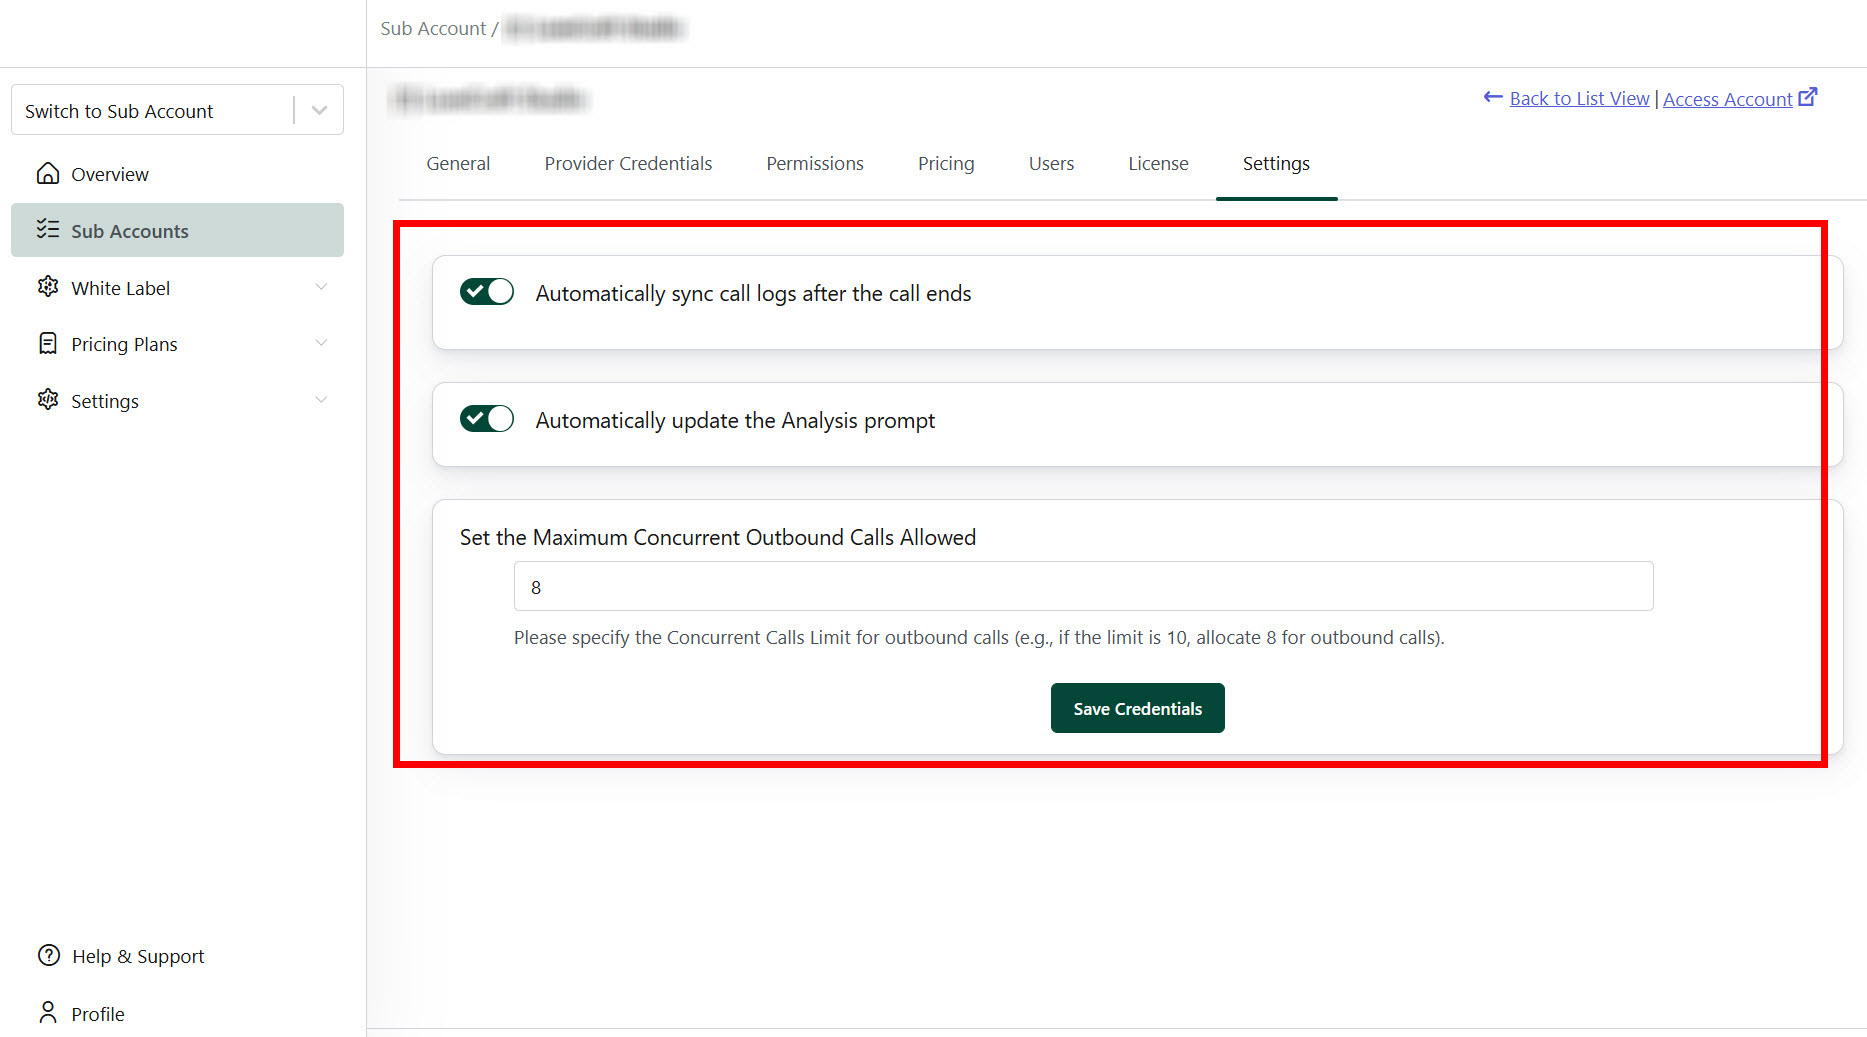
8. Settings
- Call Log Sync: Enable auto-sync without requiring a separate webhook URL.
- Concurrent Call Limit: Set the maximum concurrent outbound calls allowed. For example, if the provider limit is 10, allocate 8 for outbound calls and reserve 2 for incoming calls.
- Save Credentials: Click "Save Credentials" after completing the setup.
Notes:
- Use the “Back to List View” or “Access Account” buttons to navigate back or log in as a sub-account as needed.